
A GPS telematics install is three connections and a good hiding spot. That’s the whole job. What separates a good one from a bad one is where you get those connections, how you make them, and whether you tested it before you closed the panel.
This is the standard install we do on light-duty trucks, vans and cars. Heavy trucks get their own section further down.
Where does the GPS unit go? Three spots that cause trouble, and the one that works.
Wrong: under a steel brace. GPS signal passes through glass and plastic, not steel. A unit tucked under the dash brace struggles to hold a satellite fix.
Wrong: hanging loose by the pedals. Never let the device hang by its own wires. It can end up in the pedals, and a hanging device chafes through and fails.
Wrong: against the heater box. Heat off the heater box and its ducts can damage the unit and its wiring over time.
Right: high in the dash, tied down. Only glass and plastic between the unit and the sky, zip-tied to something solid, clear of the pedals and the heat.
Mount it high, tie it down. Give it a clear view of the sky and it stays put and keeps its signal. Built by installers, for installers.
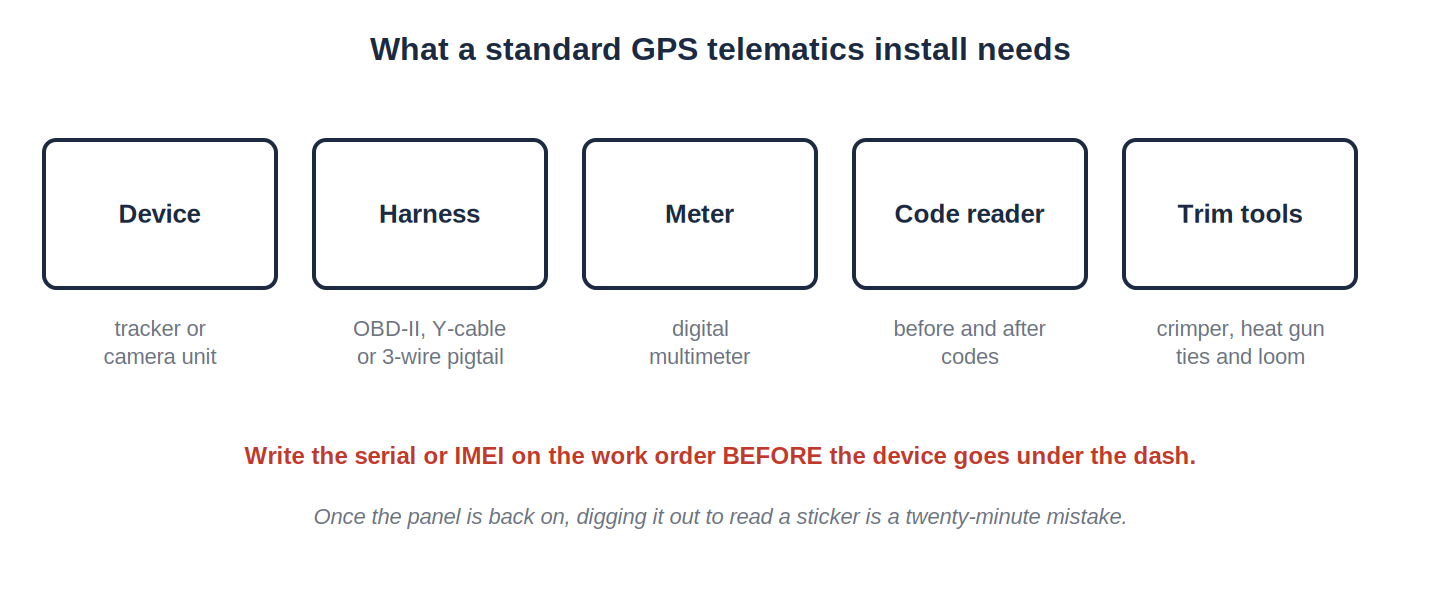
Have all of this on the seat before you pull a panel:
Write the serial or IMEI on the work order before the device goes under the dash. Once it’s hidden and the panel is back on, digging it out to read a sticker is a twenty-minute mistake.
The device needs to see the sky and stay out of the way. In that order.
Good spots - Up under the dash near the windshield, above the pedals or behind the lower kick panel - Behind the glove box - On top of the steering column shroud, under the dash pad
Bad spots - Under a metal seat pan - Inside a metal center console - Down in a footwell where feet, mats and floor water live - Anywhere near the heater core or blower motor
Mount it label up, flat, unless the manufacturer says otherwise. Some devices care which way is up for the accelerometer to read harsh braking correctly. If the manual gives an orientation, follow it.
Zip-tie it to a factory harness or a bracket. Never let it hang by its own wires. A device swinging on its harness will chafe through the insulation on a rough road, and you’ll be back.
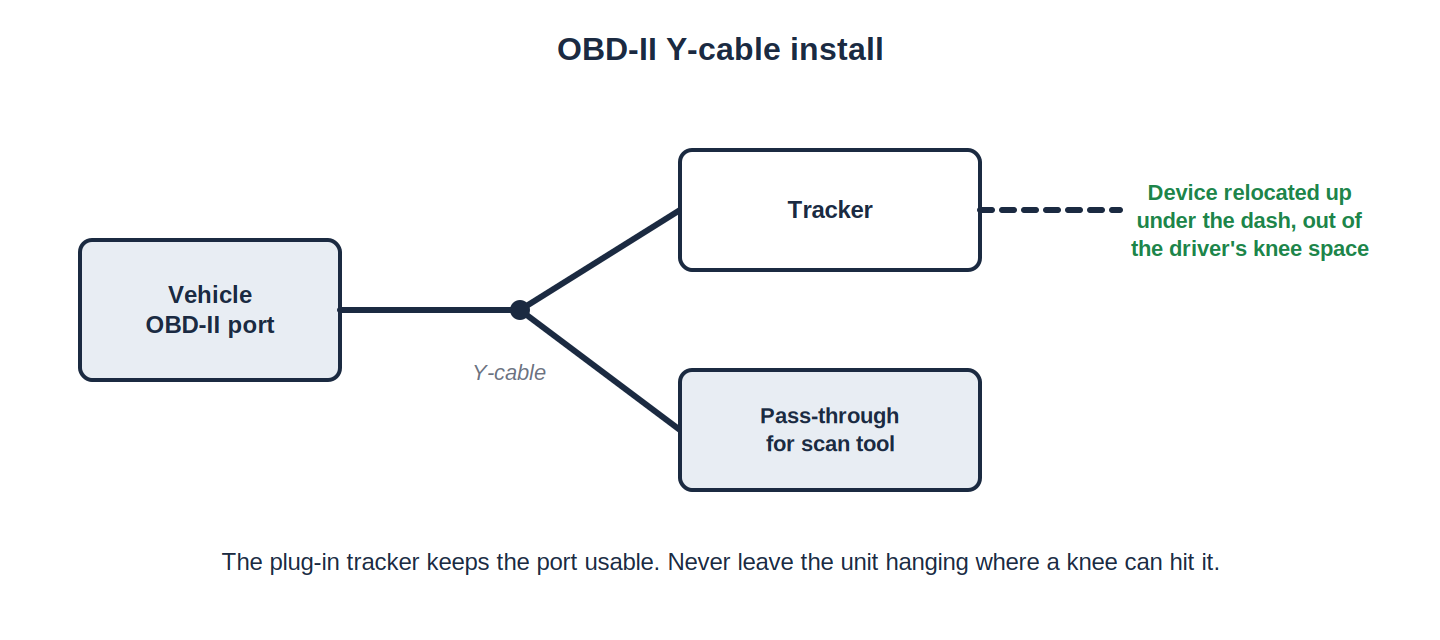
The fastest install there is, and the one most likely to get pulled out by a driver’s knee if you leave it hanging.
If the customer wants it hidden completely, run the Y-cable’s extension up behind the dash and mount the device out of reach. Same result, nobody unplugs it by accident.
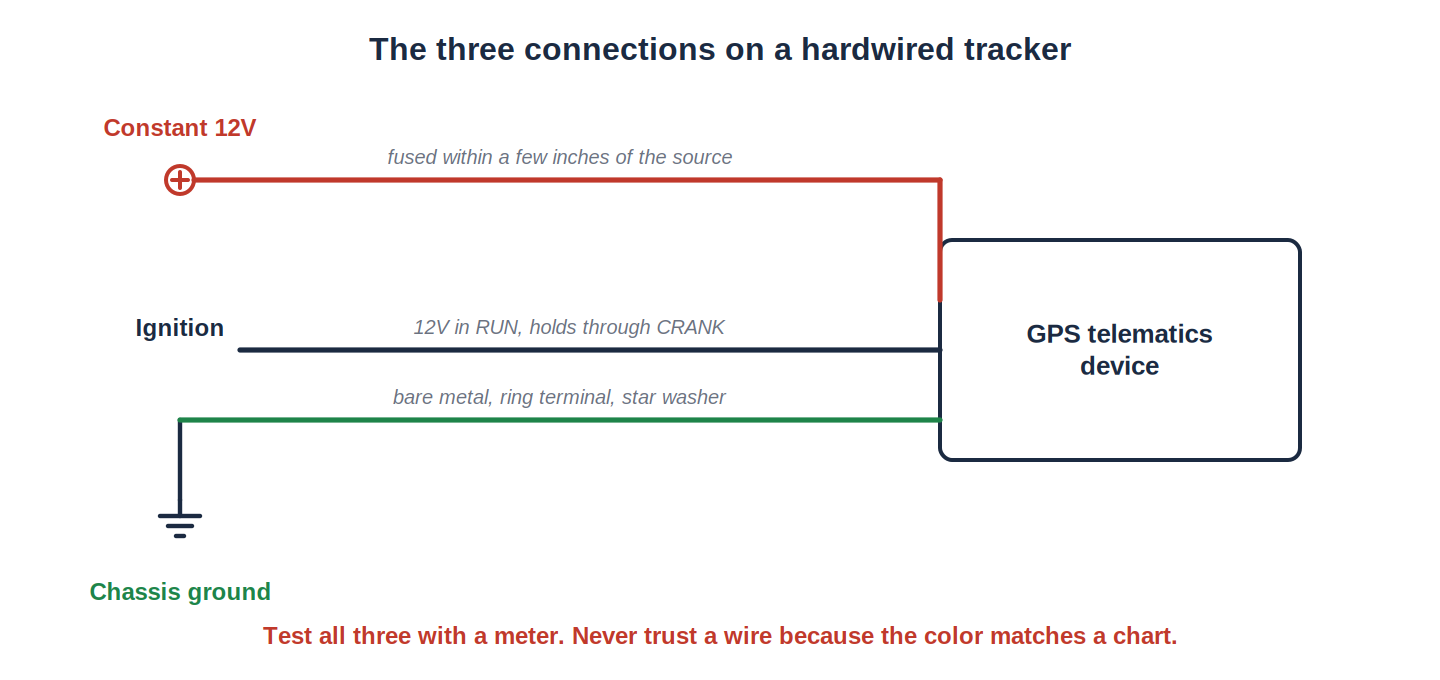
Three wires. Constant, ignition, ground. Get them from the right place and the rest is easy.
1. Find the wires. Best source is the ignition switch harness or the fuse panel. Test every wire with the meter in all four key positions.
2. Make the connections.
3. Fuse the constant. Within a few inches of where you get it. The fuse protects the wire, not the device.
4. Wire the extras if the job calls for them. Auxiliary inputs for a door switch or PTO, an output driving a starter interrupt relay. See the Relays chapter for the fail-safe way to wire an immobilizer.
Heavy trucks use a round 9-pin Deutsch connector, usually under the dash on the driver’s side, not an OBD-II port.
Look at the truck before you order the harness. Use a Y-cable so the port stays open for the shop’s scan tool. Everything else about mounting, grounding and testing is the same.
Route along the factory harness and tie to it every 8 to 12 inches. Split loom on anything exposed. Nothing crossing the pedals, the steering column, the seat tracks or the airbag harness.
The driver should never know we were in the vehicle, except that the equipment works.
Do all six. Every time.
Then take your photos: device location, ground point, power source, fuse panel. They go with the job.
Every one of these is a callback we’ve been on.
Rather have us do it? We install GPS, dash cams and telematics across Georgia, South Carolina, North Carolina, Tennessee, Virginia, Alabama, Florida and Mississippi, at your yard. Get a free quote or call/text 803-513-1009.
This information is provided as a guide. Verify every circuit with a digital multimeter before connecting to it. Proper installation is the responsibility of the installer.
We install GPS, dash cams and telematics across GA, SC, NC, TN, VA, AL, FL & MS — at your yard, on your schedule.