How Do I…Install a Dash Camera and Interior Camera in a Fleet Vehicle?
API Signal · Install Help · Dash Cam Install · Updated September 5, 2026
From the API Signal install team.
A dash cam install is a mounting job and a wire-hiding job. The wiring
is simpler than a tracker. Getting the dash cam in the right spot, aimed
right, with the wire completely out of sight, is where the work is.
This covers road-facing, dual-facing and separate interior
cameras.
What
is the difference between road-facing, dual-facing and interior
cameras?
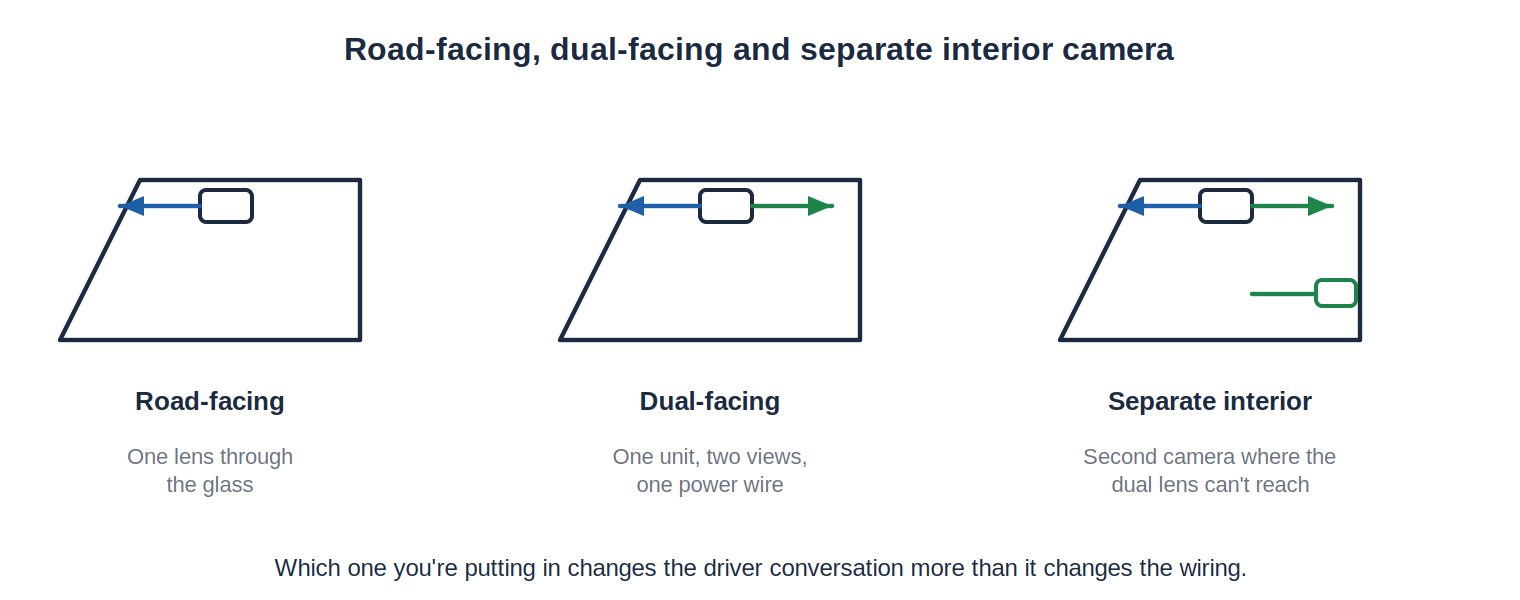
road-facing, dual-facing and separate
interior camera
Road-facing. One lens through the windshield. It
records what happened in front of the truck. This is evidence
hardware.
Dual-facing. Same housing, second lens pointing back
into the cab. One unit, two views, one power wire.
Separate interior camera. A second camera on its
own, mounted where the dual-facing lens can’t reach: a sleeper, a box, a
passenger area, a bus. Runs back to the main unit or its own
recorder.
AI cameras. Any of the above with processing on
board that flags events in real time. Same install, more attention to
aiming, because the software is judging what it sees.
Which one you’re putting in changes the driver conversation more than
it changes the wiring.
What do I
tell the driver about an interior camera?
Have this conversation before you mount it, not after.
The dash cam installs that go badly are the ones where the driver found
out by noticing a lens pointed at his face. He pulls the fuse, tapes
over it, or unplugs it, and now it’s a warranty call and a bad day for
everybody.
Two minutes of straight talk fixes it. Tell him what the dash cam sees,
when it records, and who looks at the footage. If the fleet manager
hasn’t told the drivers yet, say so to the fleet manager before you
start. That’s not our conversation to have for them, but it’s our
problem when it goes wrong.
Where does the
Dash Camera mount on the windshield?
dash cam windshield mounting
zone
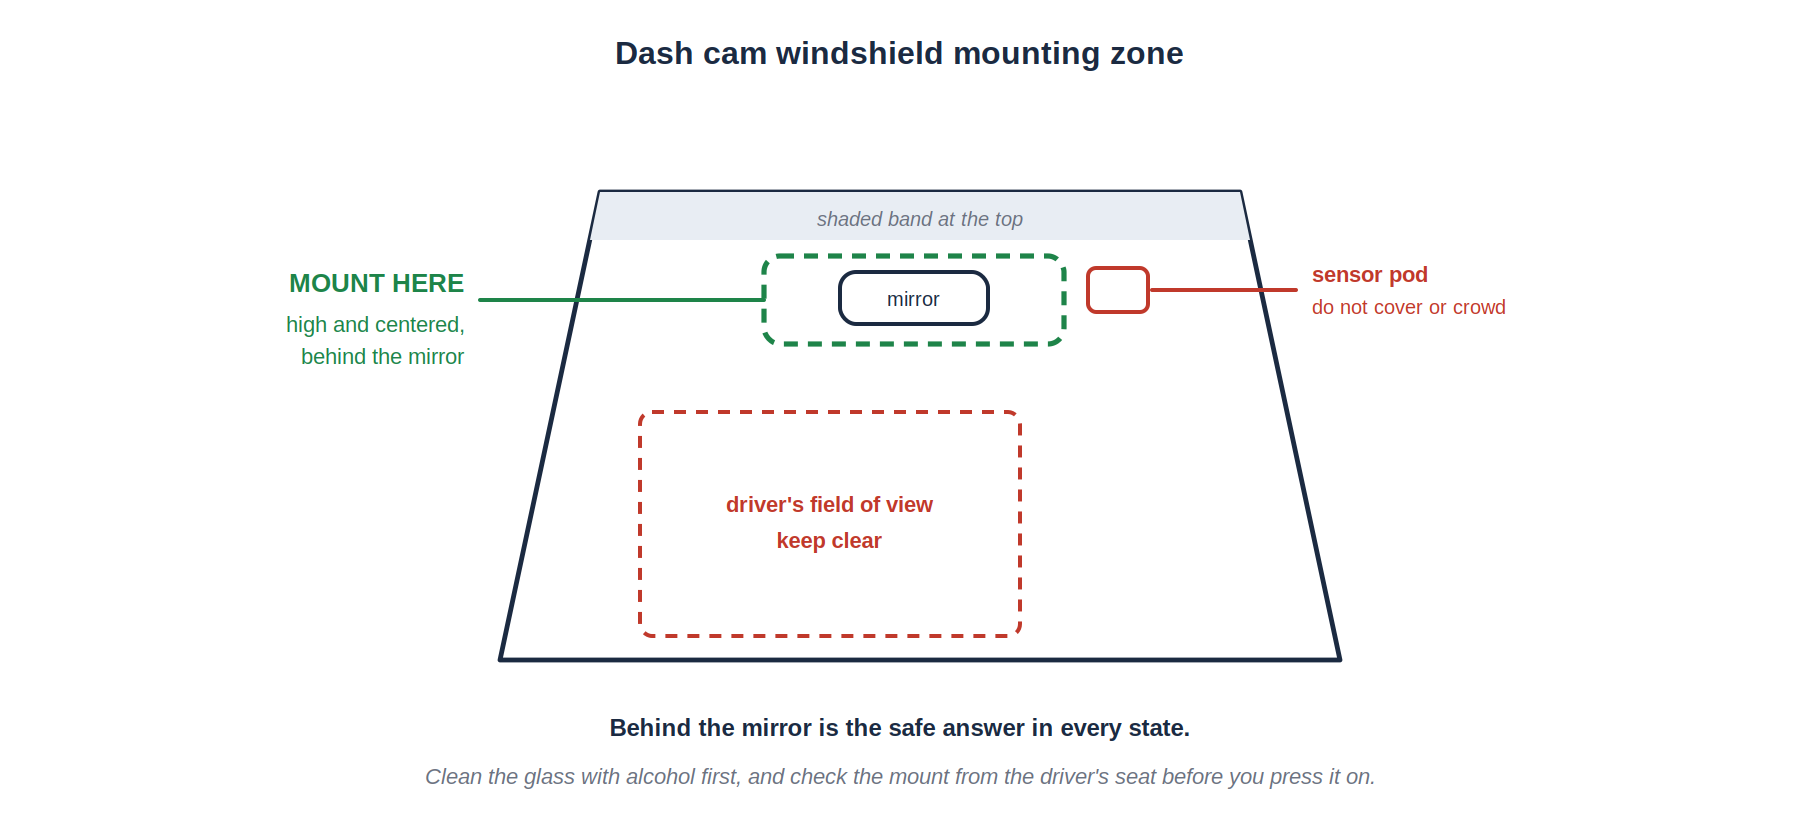
High and centered, behind the rearview mirror.
High on the glass, up in the shaded band at the top
if the windshield has one
Centered behind the mirror, where the mirror body
hides the dash cam from the driver’s eye line
Clear of the driver’s field of view. Some states
are specific about what can be stuck to a windshield. Behind the mirror
is the safe answer everywhere.
Clear of the sensor pod. Modern trucks have
lane-departure cameras, rain sensors and auto-dimming sensors up there.
Do not cover them or crowd them.
Where the wipers actually clean. A dash cam looking
through a spot the wipers miss is a dash cam that gives you a smeared clip
on the one day you needed it.
Clean the glass with alcohol and let it flash off before the
adhesive touches it. Not glass cleaner. Glass cleaner leaves a
film and the mount falls off on the first hot day.
Get it right the first time. Pulling an adhesive mount off a
windshield leaves a mark, and moving it is the most common visible
mistake on a dash cam job.
Where does a separate
interior camera go?
Depends on what the customer needs to see, but the rules are the same
every time.
High, in a corner, looking down across the space
Out of reach of anyone sitting in it
Not pointed straight into a window, or every daytime clip is a
silhouette
Not where a sun visor, a headrest or a hanging jacket blocks it
Wired the same way as the main unit, through the headliner and down
a pillar
Sit in the seat and look at the dash cam before you commit to the spot.
If you can reach it, so can the driver.
How do I run the power wire?
routing a dash cam wire from the windshield
to the fuse panel
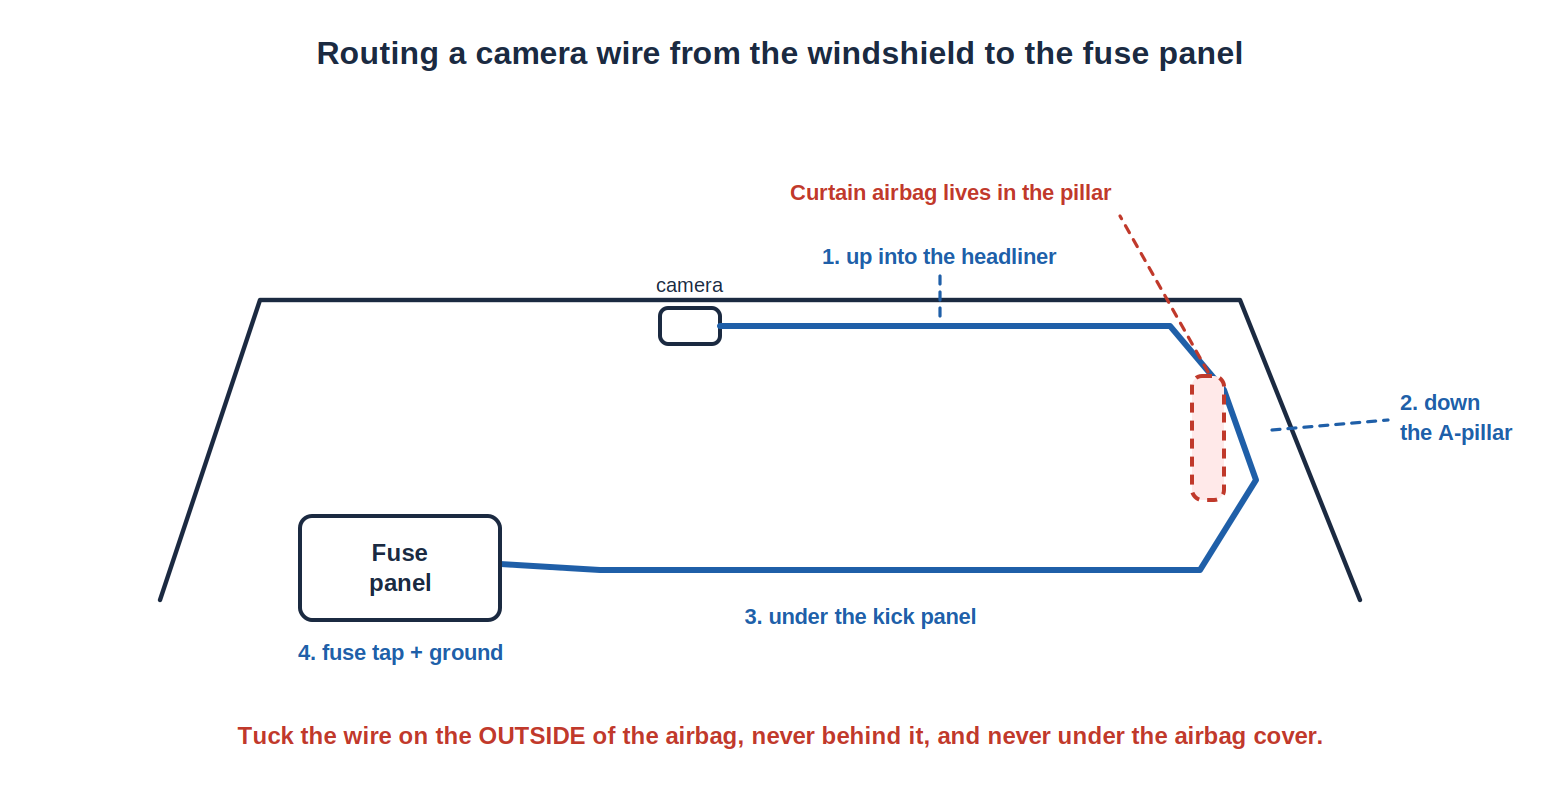
The wire should be invisible. Every inch of it.
Tuck the wire up into the headliner at the top of
the windshield. Use a nylon trim tool, not your fingers, and not a
screwdriver.
Run it across to the A-pillar on the passenger
side, or the driver side if that’s where the power is.
Open the pillar trim carefully. Almost every modern
vehicle has a curtain airbag in that pillar. Route the wire so it cannot
be in the path of that airbag or wrapped around anything the airbag
pushes. When the pillar has an airbag warning label on it, believe
it.
Down behind the pillar trim, along the door seal, into the kick
panel.
Into the fuse panel or up to the ignition switch harness.
Tie it off every 8 to 12 inches. Leave a little slack at each
end.
Tuck the wire, don’t stuff it. A wire pinched under a pillar clip is
a wire that opens six months later.
How do I power a dash camera?
Most fleet dash cams want two power connections, not one.
Constant 12 volt so the dash cam can record while the
vehicle is parked and keep its clock and settings.
Ignition so it knows when the vehicle is running,
and so parking mode knows when to drop into low power.
Ground to bare metal, ring terminal, star
washer.
Fuse the constant at the source. Fuse taps at the panel are fine,
load side, tap fuse matched to the wire you’re adding.
Parking mode is where dash cams kill batteries. A
dash cam recording all night on a truck that sits over a weekend will
flatten the battery, and the customer will blame the dash cam, then blame
us. Either use the dash cam’s low-voltage cutoff, set it, and confirm it,
or use a battery protection module. Do not leave it on the factory
default and hope.
If you’re plugging into the cigarette lighter because it’s fast,
understand that most of those sockets die with the key, which kills
parking mode, and the cord will be visible. We hardwire.
How do I aim and focus the
Dash Camera?
Aim it with the app or the platform live view, not by eye.
Road-facing: horizon roughly a third of the way
down the frame. Too much sky and you lose plate detail on the car in
front. Too much hood and you lose the intersection.
Level. A tilted dash cam reads as a sloppy install
and makes footage harder to use.
Driver-facing: the driver’s head and shoulders in
frame in a normal seated position, not the ceiling and not his lap.
Check it with someone actually sitting in the seat, adjusted the way a
driver would adjust it.
Peel the lens film off. Yes, really. It’s clear,
it’s easy to miss, and it will ruin every clip.
How do I test it before I
leave?
Confirm both lenses have a clean, aimed picture on the customer’s
platform or app.
Confirm the dash cam comes on with the key and stays on the way the
customer expects.
Confirm it uploads a clip, not just that it powered
up. A dash cam recording to a card nobody can reach is not a fleet
dash cam.
If it has an event trigger, trip one and watch the clip arrive.
Confirm parking mode and the low-voltage cutoff are set.
Key cycle the vehicle. Make sure it comes back on its own.
Read the codes again and compare to the photo you took before you
started.
Then clean the glass, wipe your fingerprints off the headliner and
the pillar, and put every clip and screw back.
What goes wrong most often?
Mount on dirty glass. It falls off in the first
heat wave.
Lens film left on. Every clip ruined and it’s a
return trip for nothing.
Dash cam crowding the factory sensor pod. Lane
departure starts throwing faults.
Wire routed through the curtain airbag path. The
worst one on this list. Don’t.
Parking mode left on default. Dead battery Monday
morning.
Driver never told about the interior lens. Dash cam
comes back taped over.
Left without confirming a clip uploaded. The dash cam
was never the deliverable. The footage was.
Rather have us do it? We install GPS, dash cams and telematics across Georgia, South Carolina, North Carolina, Tennessee, Virginia, Alabama, Florida and Mississippi, at your yard. Get a free quote or call/text 803-513-1009.
This information is provided as a guide. Verify every circuit with a digital multimeter before connecting to it. Proper installation is the responsibility of the installer.